 Our team of beauty experts has years of experience in the industry and is dedicated to sharing their expertise with you. From the latest makeup trends to tips on how to achieve a perfect hairstyle, we have you covered. We also provide in-depth reviews and recommendations on the best beauty products in the market.
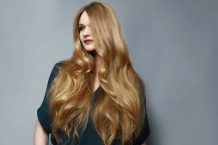
Are you tired of spending hours and dollars at the salon just to achieve that perfect blowout? You can achieve a salon-quality blowout at home without breaking the bank with the right tools and techniques. Whether you have thick, curly hair or fine, straight locks, getting a professional-looking blowout at home is easier than you think. This blog post will share tips and tricks to help you achieve salon-quality results and feel confident rocking your freshly blown-out hair. So say goodbye to bad hair days and hello to gorgeous, bouncy locks!
DIY Blowout: Tips and Tricks for Pre-Blowout Preparation
Before starting your at-home blowout, it’s important to prepare your hair to ensure the best results properly.
The first step in preparing for a blowout is to shampoo and condition your hair. It’s important to choose a shampoo and conditioner that is appropriate for your hair type, whether it be dry, oily, or normal.
Once you’ve washed your hair, it’s time to towel-dry it. It’s best to use a microfiber towel or an old t-shirt, as these materials are gentle on your hair and won’t cause any unnecessary damage. Avoid using a regular towel, as the rough fibers can cause breakage and frizz.
After towel-drying, applying a heat protectant product to your hair is crucial. This will help to minimize the damage caused by the high temperatures of the blow dryer. Heat protectant sprays and serums are widely available and should be applied throughout your hair, paying particular attention to the most fragile ends.
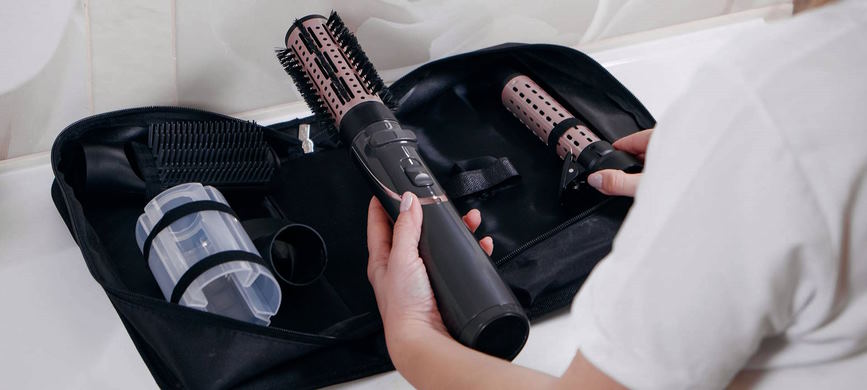
Lastly, choosing the right tools is essential for achieving a salon-quality blowout. You’ll need a blow dryer with multiple heat and speed settings, a round brush with natural bristles, and sectioning clips to keep your hair organized. In addition, it’s important to choose a brush size appropriate for your hair length and texture, as this will affect the level of volume and curl you can achieve.
By following these pre-blowout preparation tips, you’ll be well on your way to achieving a beautiful and long-lasting blowout at home. Remember, taking the time to prepare your hair properly is key to getting the best results possible.
Get the Perfect Salon Blowout at Home: Mastering the Blowout Process
Now that you’ve properly prepared your hair for a blowout, it’s time to get started with the actual styling process. The blowout process may seem daunting, but by following these simple steps, you’ll be able to achieve a professional-quality blowout at home.
To start, separate your hair into sections, starting with the underside of your hair. This will allow you to work on smaller sections at a time, making achieving a smooth and voluminous finish easier. Next, use sectioning clips to keep the rest of your hair out of the way.
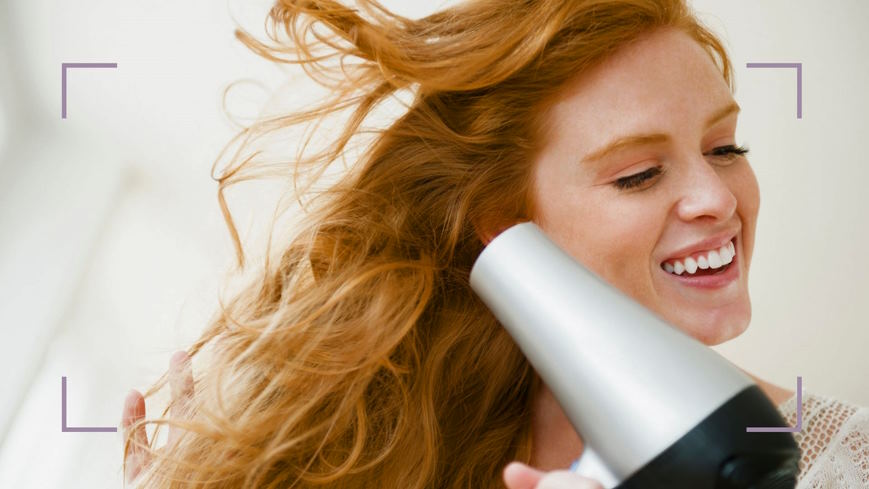
Next, use a round brush with natural bristles to create volume and lift at the roots. Place the brush underneath your hair and pull it upwards, following the brush with your blow dryer. The heat from the dryer will help to set the style, while the brush will create volume and shape.
Work your way around your head, section by section, until you have blow-dried all your hair. Working in small sections is important to ensure that each piece is thoroughly dried and styled.
As you blow dry, make sure to point the nozzle of the dryer downwards. This will help to smooth the hair cuticle and create a sleek, polished finish. If you point the nozzle upwards, you’ll create frizz and flyaways.
Don’t rush through the blowout process. Instead, take your time to ensure that each section is thoroughly dried and styled. It may take longer than you’re used to, but the result will be well worth it.
By following these blowout process tips, you’ll be well on your way to achieving a salon-quality blowout at home. Remember to work in sections, use a round brush to create volume, point the nozzle downwards, and take your time. With a bit of practice, you’ll be able to achieve a flawless blowout every time.
At-Home Blowout: Tips for Achieving a Salon-Worthy Finish
After you’ve finished blow-drying your hair, it’s time to add the finishing touches to your at-home blowout. These final steps will help to set your style and add a touch of polish to your hair.
To start, apply a small amount of finishing product to your hair. This could be a hair oil, shine spray, or any other product that will help to smooth and add shine to your hair. Then, use your fingers to distribute the product evenly throughout your hair.
Next, set the style by using the cool shot button on your blow dryer. The cool air will help to lock in the shape and smooth the cuticle, creating a long-lasting finish. Simply hold the cool shot button down for a few seconds on each section of your hair.
Finally, use a smoothing brush to touch up any flyaways or frizz. This will help to create a sleek, polished finish. Use the brush to smooth down any stray hairs around your hairline, and gently brush through the ends of your hair to create a smooth, bouncy finish.
By adding these finishing touches to your at-home blowout, you’ll be able to create a salon-quality style that will last all day. So don’t skip this step; it can make all the difference in achieving a flawless finish.
In summary, apply a finishing product to add shine and smoothness to your hair, use the cool shot button to set the style, and use a smoothing brush to touch up any flyaways. With these simple tips, you’ll be able to create a beautiful blowout at home that looks like a professional did it.